


How To Make Pour Over Coffee
Make the perfect pour over coffee at home every time.
How to Make Pour-Over Coffee
Make the perfect Pour Over at home every time.
Pour over coffee sounds complicated, but this coffee brewing process is surprisingly simple and the results can be amazing with just a little practice. If you drink a single cup each morning, or want to try different types of coffee, making pour over coffee can be even easier than setting up your home coffee machine (bonus — cleanup takes seconds). And because you’re in control of factors like water temperature and brew time, you can expect amazing flavor in the finished cup.
The term “pour over” can describe many different coffee makers, from the Kalita Wave to the traditional Melitta Cone, and even a Chemex. You might have to make small adjustments depending on which pour over coffee maker you’re using, but this recipe is a good starting point for all of them. While the paper filters used with most pour overs help the clean flavor of lighter roasts shine, you can use any coffee you choose for this method.
What You Need
- A Pour-Over brewer
- Paper filter
- A gooseneck kettle
- A scale (optional)
- 12 oz / 350 ml of boiling water (198-205 degrees F works best)
- 0.75 oz / 21 g of medium ground coffee. Don't have a grinder? We can grind it for you!
Getting Started
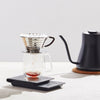
1. Add Coffee Filter & Grounds
If you’re grinding your coffee beans fresh, you’ll want your coffee grinder on a medium setting. Based on your results, the grind setting is one of the main variables you can adjust for future brews.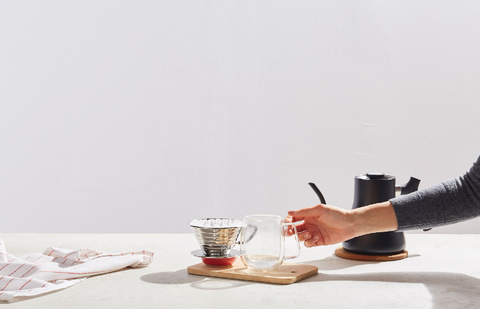
Set your mug and brewer on top of your scale (if you’re using one) and add coffee grounds to the filter. Give your brewer a quick shake to level the coffee grounds; this will help you get even extraction, which is super important on your journey toward delicious coffee.
2. Bloom to Enhance
When it comes to blooming coffee, follow these simple steps:
- Tare (zero out) your scale.
- Start a timer and slowly pour the filtered water (around 200 degrees Fahrenheit, or around 20 seconds off the boil) equaling about double the weight of the coffee (about 1.5 oz / 45 g of water).
- Make sure to cover all of the grounds with water, hitting any spots that are still dry after your initial pour. You’ll notice bubbles — that’s carbon dioxide exiting the coffee grounds.
- Wait 45 seconds.
2. Pour Water
Grab your hot water, making sure your temperature is within a few degrees of 200 F, or 20 seconds off the boil. Start pouring your water in a slow circular motion. Pour about half your water to start, then let the water level drop a little and refill. This is the part of making pour over that takes a little practice, because you don’t want all your water to drip through too fast or too slowly. If the water level starts to come close to the top of your brewer while pouring, slow down your pour or allow for a brief pause to avoid an overflow.

4. Let Drip
Keep an eye on your coffee as the water drips through, and when you start to see the coffee grounds appear, remove the brewer from your mug and place it in the sink or on another cup to drain (the last few drops of water can be a little bitter). The timer should read between 2:30 to 3:30 minutes. If your water is taking too much time to drip through, try to either pour faster or set your grinder a little coarser next time. If it’s going through too quickly, a slow pour or finer grind size is needed.
5. Serve
Serve your brewed coffee from your carafe or let it cool slightly if you’ve brewed it into a mug! When it comes to cleaning your coffee maker, discard or compost your coffee grounds and rinse the pour over coffee maker with any remaining hot water from your kettle.
In order to ensure you master the perfect cup of coffee, check out our other coffee brewing tips and tricks.
FAQs
What is the best grind size for pour-over coffee?- A medium-fine grind works best for pour-over coffee to achieve optimal extraction and flavor.
- A good starting point is to use a coffee-to-water ratio of 1:16, or about 1 ounce of coffee for every 16 ounces of water.
- The water temperature should be between 195°F and 205°F (90°C to 96°C) for pour-over brewing to ensure proper extraction without scorching the grounds.
- Allow the coffee to bloom for about 30 seconds by pouring a small amount of hot water over the grounds and letting them swell before continuing with the rest of the pour.
- While you can technically use any type of coffee beans for pour-over brewing, single-origin beans with complex flavors shine best in this method, allowing you to appreciate their unique characteristics fully.
Enhance Your Pour-Over Coffee with a Trade Coffee Subscription
At Trade, we're passionate about enhancing your at-home coffee experience. Our coffee subscriptions are designed to elevate your mornings with freshly roasted beans delivered straight to your doorstep. Whether you're a casual coffee enthusiast or a seasoned connoisseur, our curated selection of specialty coffees from top roasters across the country ensures that you'll discover new and exciting flavors with each sip.
With our easy-to-use subscription service, you can customize your coffee deliveries based on your preferences, ensuring that you always have the perfect brew on hand. Whether you prefer balanced and fruity notes or rich and bold flavors, we have something to suit every palate. Plus, with our flexible subscription options, you can easily adjust your delivery frequency or skip shipments whenever you need.
FAQS


